Ever tried to get that tiny golf ball to sit just right on its tee inside a snow globe? It can feel like you’re playing a frustratingly delicate round of miniature golf where the stakes are your sanity! But don’t worry, you’re about to conquer this whimsical challenge.
Choosing the Right Snow Globe
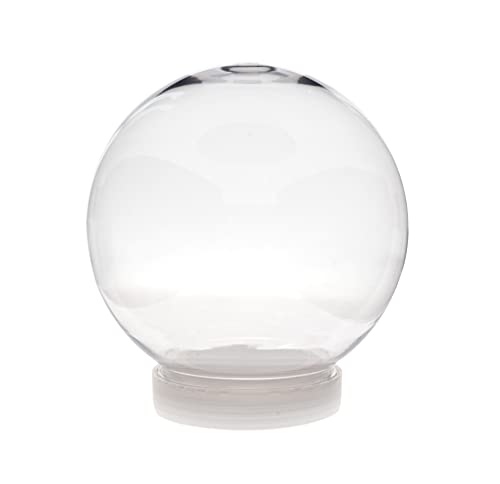
When you’re tapping into the precision of your golf swing to set up your tiny golfer’s paradise, the type of snow globe you select matters as much as choosing the right club for a par-3. Think of it like assessing the lay of the green; the details can make or break your final shot.
Start by eyeing the size of the globe. Your golf ball will need ample clearance around the tee, very much like you need enough space to avoid those pesky bunker walls. Big enough to showcase your ball but not so vast that it looks lost, just right. Remember, balance is key, both in your stance and in your globe.
Material-wise, opt for a sturdy snow globe that can stand the test of time – akin to a well-gripped driver that doesn’t falter at the tee box. Glass globes offer a clearer view, so you can admire your handiwork as effectively as checking your swing path. However, the resilience of plastic may better suit those who aren’t strangers to the occasional mulligan.
Here’s a pro tip: check the base. It should be flat and solid, just like how you’d want your feet to be when you’re about to swing. A wobbly base could send your golf ball on an unwanted journey, as if it’s a putt that hits a spike mark.
Lastly, consider the interior scene. Opt for simplicity. A cluttered design can distract from the true star of the show – the golf ball on its tee. It’s like having too many swing thoughts; sometimes, less is more. Focus on a backdrop that complements, not complicates.
Assuming you’ve sized up your globe like you would the right iron for a snug fairway lie, you’re closer to nailing this intricate task. Keep these pointers in mind, and you’re sure to select a snow globe that sets the stage for your inner golfer’s triumph.
Preparing the Golf Ball
Before you even think about placing the ball onto the tee, it’s crucial to prepare it for its frosty placement within the snow globe. Remember, in golf as in life, preparation is key. You wouldn’t head out to the course without warming up; similarly, you don’t want your golf ball going into the globe unprepared.
Start by cleaning the golf ball. It might seem like a minor step, but a clean ball ensures that there’s no debris that could potentially affect the placement. Plus, it just looks better! Use warm, soapy water to gently scrub the ball, and then dry it thoroughly. Once it’s dry, check for any scuffs or imperfections. A pristine ball will reflect your attention to detail and commitment to quality.


Next, focus on modifying the ball if needed. In some cases, you may find that adding a small dab of adhesive or a clear sealant helps to stabilize the ball on the tee. Not every golfer will choose to go this route, but it’s a viable option if you’re looking for an extra bit of security.
Here are a few handy materials you might need for preparing the ball:
- Soft cloth
- Mild soap
- Warm water
- Clear adhesive or sealant (optional)
Practice handling the ball and the tee together. Manipulate them to determine the best balance point, and consider how they will interact within the snow globe environment. This practice session will help you to get a feel for the task at hand. Just as you’d familiarize yourself with a new club or a unique course, you need to become acquainted with how your golf ball and tee will function together in their miniature, snowy world.
Remember, a well-prepared golf ball not only ensures a successful setup but also honors the finer points of the game you love. With the ball now ready, you can move on to the meticulous process of positioning it atop the tee inside your chosen snow globe. Keep your focus, maintain a steady hand, and envision the ball sitting perfectly on the tee – because soon, that vision will be a reality.
Creating a Stable Base
When tackling the somewhat delicate task of positioning a golf ball on a tee within a snow globe, it’s paramount to forge a stable base. You wouldn’t tee up on the course with a wobbly stance, so don’t skimp on this step in your miniaturized world.


Initially, you’ll want to zero in on the bottom of your snow globe. It must be flat and even to provide the stability you’re aiming for. If it’s an old snow globe, ensure there’s no lingering residue or old adhesive that might throw your ball off balance. A smooth, clean surface is your best friend in this scenario.
Secure the tee to the base with a dab of epoxy or specialty craft glue. These adhesives are designed to withstand minor movements and temperature variations without losing their grip. Just remember, less is more with adhesive—too much and you risk an unsightly mess that could obstruct the view of your scenic miniature fairway.
Let the glue set completely, which may take up to 24 hours depending on the product used. This waiting period ensures the bond is solid and ready to hold the weight of the ball. Don’t rush this; patience is just as vital here as it is when you’re eyeing a crucial putt on the 18th green.
Once the tee is immovable, look to the golf ball’s contact points. The challenge here lies in ensuring the ball doesn’t merely balance but rather sits securely. You might consider a tiny application of clear sealant on the top of the tee. This can add a little grip without being visible, mirroring the assurance you get from gripping the club before a swing.
Finally, get a feel for gently placing the ball onto the tee. It’s akin to addressing the ball on the tee box with precision and care, something you’re familiar with. The sense of touch is crucial, as applying too much force could send your miniature green into disarray, much like a poorly executed drive.

« Unlock Lower Scores: Secret Bridgestone Golf Balls You Need to Try
Discover Who Invented Golf Ball Dimples – Up Your Game »
With the base set, tee anchored, and the ball’s placement honed with the right touch, you’re well on your way to mastering this scaled-down version of the familiar pre-shot ritual.
Placing the Golf Ball on the Tee
Once you’ve got your tee anchored firmly in place, it’s time to focus on getting the golf ball to sit perfectly on top. Remember, it’s all about precision and patience. This delicate step is the bridge between preparation and the satisfaction of a well-executed display.
First things first, check that the ball’s dimples are free of any debris or dust. Any small particles can cause instability, which you’re striving to avoid. With a steady hand, pick up the golf ball, taking care to touch it as little as possible to keep it clean.
Next, approach the tee. Your aim is to align the golf ball so that it sits flush against the sealant you applied earlier. This might take a couple of attempts, but don’t get discouraged – even the pros take their time with this step. It’s not a race; it’s about achieving perfection.
Here’s where your golfing finesse comes into play. Using just your fingertips, gently lower the ball onto the center of the tee. The grip from the sealant should take hold, but you don’t want to apply any downward pressure. Let the ball naturally settle into position.

With the ball on the tee, give it a soft tap – not a push – to ensure it’s secure. If you’ve done it right, the ball should barely move, but you’ll feel it’s snug and ready to be displayed.
Keep in mind that this isn’t merely about aesthetics; it’s about bringing a part of the game you love into your home or office. With exceptional steadiness and the golf wisdom you’ve refined over your years on the green, this task is undeniably within your grasp.
Setting a snow globe golf scene is much like setting up for a crucial shot. You survey, you plan, and you execute with careful consideration and control. The process might be meticulous, but that moment when everything is in place feels just like sinking a challenging putt—with the added benefit that this shot doesn’t need to take flight under unpredictable conditions.
Testing for Stability
Once the golf ball rests securely on the tee inside your snow globe, it’s time to ensure that it can withstand the inevitable shuffle and bustle it might face. Testing for stability is a crucial step – similar to reading a green before putting. You’d inspect every angle and ensure your ball won’t roll away at the slightest touch.
Give your snow globe a gentle shake, just a mild nudge like a soft breeze on a fairway. Observe closely how the ball on the tee responds. You’re not looking to emulate a strong wind here; imagine you’re testing the waters before a cautious tee shot when the stakes are high. Any movement of the ball suggests that you need to reevaluate the solidity of your tee placement.

If adjustments are necessary, address the sealant’s sturdiness surrounding the tee. Just like regripping your club mid-season for that perfect hold, redo the tee’s set-up using a little more sealant and allowing it to dry thoroughly. Patience is your ally in this process; permit the globe to settle before testing again. Allowing the sealant to cure correctly is akin to letting the green soak up the morning dew – essential for optimal play.
Check for Long-Term Stability by letting the snow globe sit for a day or two. Return to it periodically, just as you’d check the lie of your ball on a course over a couple of practice rounds. Gently tap the glass – not too dissimilar from tapping your putter on the ground while sizing up a putt – to simulate the vibrations it may endure once displayed.
Should the ball remain steadfast, you’ve aced this part. There’s no need for an aggressive shake; your snow globe and its inner scenic stage are designed to be admired with calmness and tranquility, much like the soft appreciation of a golf course on an early morning.
Conclusion
You’ve mastered the delicate art of securing a golf ball on a tee in your snow globe! Remember, patience is key. Just like in golf, the follow-through is as important as the setup. Let your globe settle and give it that gentle tap to ensure your handiwork holds up. If it does, it’s time to admire your work and maybe even show it off. You’ve added a personal touch to your space that’s both creative and conversation-starting. So go ahead, give yourself a pat on the back – you’ve earned it!
