If you’re an avid golfer, you know that having a reliable ball marker is crucial for keeping track of your ball’s position on the green. But why settle for a generic marker from the store when you can create your own DIY golf ball marker? Not only will it be a unique and personalized addition to your golf bag, but it can also be a fun and rewarding project to undertake.
To start your DIY golf ball marker project, you’ll need to understand what golf ball markers are and their purpose on the green. Golf ball markers are small, flat objects that are placed on the green to mark the position of your ball while you take your shot. This allows you to lift and clean your ball without losing your position on the green. While there are many different types of ball markers available, creating your own unique marker can be a fun and creative way to add a personal touch to your game.
To create your own DIY golf ball marker, you’ll need a few basic materials and tools, such as a metal washer, epoxy glue, and a design template. Once you have your materials, you can begin designing your marker using a variety of customization techniques, such as painting, engraving, or using stickers. With a little creativity and some basic crafting skills, you can create a one-of-a-kind marker that reflects your personality and style.
Key Takeaways
- Golf ball markers are small, flat objects used to mark the position of your ball on the green.
- Creating your own DIY golf ball marker is a fun and creative way to add a personal touch to your game.
- With a few basic materials and tools, you can design and customize your own unique marker using a variety of techniques.
Understanding Golf Ball Markers
https://www.youtube.com/watch?v=4Yeuit5IZ2I&embed=true
If you’re new to golf, you may not be familiar with the term “golf ball marker.” A ball marker is a small, flat object that is used to mark the position of your golf ball on the green. This is important because once you’ve lifted your ball, you need to be able to put it back in the same spot so you can continue playing.
Purpose of Ball Markers
The purpose of a ball marker is to allow you to lift your ball from the green without disrupting the play of other golfers. If you don’t use a ball marker, you’ll have to remember the exact spot where your ball was and hope that you can put it back in the same spot without disturbing the grass or the other golfers.
Types of Ball Markers
There are many types of ball markers available, from simple plastic or metal discs to more elaborate designs that feature logos or other graphics. Some golfers even create their own ball markers using DIY techniques, such as using bottle caps or creating custom designs using paint or other materials.
When choosing a ball marker, it’s important to consider factors such as size, weight, and durability. You’ll want to choose a marker that is easy to see and won’t blow away in the wind. Many golfers prefer markers that are magnetic, as these are less likely to get lost or misplaced.
In summary, a ball marker is an essential tool for any golfer who wants to play the game properly and respectfully. By using a marker to mark the position of your ball on the green, you can avoid disrupting the play of other golfers and ensure that you’re playing the game fairly. There are many types of ball markers available, so be sure to choose one that suits your needs and preferences.
Materials and Tools
https://www.youtube.com/watch?v=hTDI4k6rscE&embed=true
Choosing the Right Materials
When it comes to making your own golf ball marker, you want to start with the right materials. One popular option is to use bottle caps. These can be easily obtained from your favorite beverage and come in a variety of colors and designs. You can also use coins, such as pennies or dimes, for a classic look.
In addition to the material for the marker itself, you’ll need adhesive to attach it to your ball. Super glue or Gorilla glue work well for this purpose. You may also want to use masking tape to hold the marker in place while the glue dries.
Essential Crafting Tools
To make your own golf ball marker, you’ll need a few essential crafting tools. Pliers are a must-have for bending and shaping the metal material you choose. A metal file or grinder can also be useful for smoothing rough edges and creating a polished finish.


Scissors are useful for cutting out any designs or shapes you want to add to your marker. You may also want to use a fine-tip marker or pen to sketch out your design before cutting.
Overall, making your own golf ball marker is a fun and creative way to personalize your game. With just a few materials and tools, you can create a unique marker that reflects your personality and style.
Designing Your Golf Ball Marker
https://www.youtube.com/watch?v=poF6DXg-_k0&embed=true
Creating your own golf ball marker is a great way to add a personal touch to your game. Designing your marker is the first step in the process, and there are several ways to go about it.
Creating a Template
Before you start designing your golf ball marker, it’s a good idea to create a template. This will help you visualize your design and make sure that everything is in the right place. You can create a template using a piece of paper or a computer program like Microsoft Word or Adobe Illustrator.


When creating your template, consider the size and shape of your golf ball marker. Most markers are circular and around 1 inch in diameter. You can also choose to create a rectangular or square marker if you prefer.
Adding Personal Touches
Once you have your template, it’s time to add some personal touches to your golf ball marker. You can add your favorite brew logo or a design that reflects your personality. Some popular designs include a straight line, a dot, or a T-line.
You can use stencils or templates to create your design, or you can freehand it with a Sharpie. If you’re using a stencil or template, make sure it’s the right size for your golf ball marker.
Remember that your golf ball marker is a reflection of your personality and style. Don’t be afraid to get creative and add your own personal touch.
In conclusion, designing your golf ball marker is a fun and easy DIY project that can add some personality to your game. Creating a template and adding personal touches are the two main steps in the design process. Whether you use stencils or freehand it with a Sharpie, your golf ball marker is sure to be a hit on the course.

Preparation Process
« Best Golf Ball for the Money: Affordable Options for Your Next Game
How to Fade a Golf Ball: Tips and Techniques for Better Shots »
https://www.youtube.com/watch?v=CGvs80Xx6Yc&embed=true
Before you can create your own custom ball marker, you need to prepare your materials. This section will guide you through the preparation process with two subsections: Cleaning and Flattening and Marking and Cutting.
Cleaning and Flattening
The first step in preparing your golf ball for a custom ball marker is to clean it thoroughly. You can use rubbing alcohol or acetone to clean the surface of the golf ball. Pour a small amount of rubbing alcohol or acetone on a cleaning cloth or cotton pad and use it to wipe the surface of the golf ball. This will ensure that the marker adheres to the ball properly.
Next, you need to flatten the crimped edges of a bottle cap. You can use pliers to bend the crimped edges of the bottle cap circumferentially. This will flatten the bottle cap and give you a reference for where to grind down the edges.
Marking and Cutting
Once you have cleaned and flattened the bottle cap, you can move on to marking and cutting it. You can use a marker to draw your design on the bottle cap. You can also use a template or stencil to ensure that your design is accurate.

After marking your design, you can use a cutting tool to cut out your custom ball marker. You can use scissors, a knife, or a specialized cutting tool for this step. Be careful not to cut yourself or damage the marker while cutting.
Once you have cut out your custom ball marker, you can pocket it for future use. You can also attach it to a hat clip or magnetic holder for easy access on the golf course.
That’s it! With these simple steps, you can create your own custom ball marker for a personalized touch on the golf course.
Assembling the Marker
https://www.youtube.com/watch?v=O37XTJsjcjE&embed=true
Once you have designed and cut out your golf ball marker, it’s time to assemble it. This section will guide you through the process of assembling your marker, including gluing components together and ensuring proper weight and balance.

Gluing Components Together
To glue the components of your marker together, you will need a strong adhesive. Super glue or gorilla glue are two popular options. Apply a small amount of glue to one side of the marker and press the other side onto it, aligning the edges carefully. Hold the pieces together for a few seconds to allow the glue to set.
Ensuring Proper Weight and Balance
The weight and balance of your marker are important factors to consider. If your marker is too light, it may not stay in place on the green. If it is too heavy, it may affect the roll of the ball. To ensure proper weight and balance, you can add a small weight to the center of your marker.
One way to add weight is to glue a small metal washer to the back of your marker. This will add weight without affecting the appearance of the marker. Another option is to fill the cavity of your marker with a heavy material such as lead or tungsten powder. Be sure to use caution when handling these materials and follow all safety guidelines.
By following these simple steps, you can assemble a custom golf ball marker that is both functional and stylish. With the right glue and weight, your marker will stay in place on the green and help you make your mark on the course.
Customization Techniques
Customizing your own golf ball markers is a fun and creative way to add a personal touch to your golf game. There are several techniques you can use to create unique and customized golf ball markers.
Adding Colors and Logos
One of the easiest ways to customize your golf ball markers is by adding colors and logos. You can use a sharpie to draw designs or logos on your golf ball markers. You can also use stickers or decals to add color and personality to your markers. If you have a specific logo or design in mind, you can have it printed on your golf ball markers by a professional company.
Engraving and Embellishing
Another way to customize your golf ball markers is by engraving or embellishing them. You can engrave your initials, name, or a special message onto your markers. You can also add embellishments such as rhinestones, beads, or charms to make your markers stand out.
When it comes to engraving, you can use a variety of tools such as a Dremel tool or a laser engraver. If you choose to add embellishments, make sure they are securely attached to the marker and won’t interfere with the ball’s roll.
Overall, there are many ways to customize your golf ball markers and make them stand out on the green. Whether you choose to add colors and logos or engrave and embellish, the possibilities are endless. So get creative and make your own unique and personalized golf ball markers today!
DIY Marker Ideas
If you’re a golf enthusiast, you know that having a unique ball marker can be a great conversation starter on the course. Luckily, there are plenty of DIY options to make your own custom markers. Here are some ideas to get you started.
Using Everyday Items
One of the easiest ways to make a DIY golf ball marker is to use everyday items that you might already have lying around your house. For example, you can use a penny or a dime as a marker. Simply clean the coin and use a permanent marker to draw a design on the face. You can also use bottle caps, which can be painted or decorated with stickers for a more personalized touch.
Themed Markers
If you want to take your DIY golf ball marker to the next level, consider making a themed marker. For example, you can make a marker that represents your favorite sports team or a marker that matches the colors of your golf bag. To make a themed marker, you can use colored beads, fabric, or paint to create a design that fits your theme.
Another idea is to make a marker that represents your personality. For example, if you’re a fan of Star Wars, you can make a marker that looks like a lightsaber. Or, if you’re a fan of music, you can make a marker that looks like a guitar pick.
No matter what DIY golf ball marker you choose to make, the possibilities are endless. With a little creativity and some basic crafting supplies, you can make a marker that is unique and personal to you.
Integrating Magnets
If you want to create a unique and functional DIY golf ball marker, consider integrating magnets into your design. Magnets can make your ball marker more convenient to use and can help ensure that it stays in place on the green. Here are a few ways to incorporate magnets into your ball marker design:

Creating Magnetic Ball Markers
One way to create a magnetic ball marker is to use a small magnet and attach it to the underside of your marker. You can use a variety of materials for your marker, such as wood, metal, or plastic. Simply glue the magnet to the underside of your marker and allow it to dry completely.
Another option is to use a magnetic sheet to create your ball marker. Magnetic sheets are available at many craft stores and can be cut to any size or shape. Simply cut out your desired shape and decorate it as desired. The magnetic backing will hold the marker in place on the green.
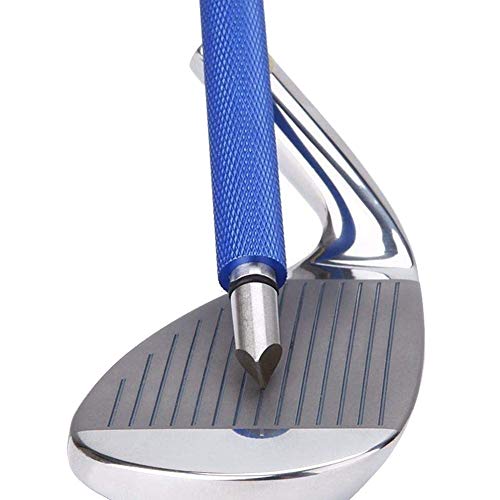
Combining with Divot Tools
Another way to incorporate magnets into your golf game is to combine your ball marker with a divot tool. A divot tool is a small, fork-like tool that is used to repair divots in the green. By combining your ball marker with a divot tool, you can have two essential golf accessories in one.
To create a magnetic divot tool, simply attach a small magnet to the underside of your divot tool. You can then attach your magnetic ball marker to the magnet when you are not using it. This will help ensure that you don’t lose your ball marker while you are repairing divots on the green.
Overall, integrating magnets into your DIY golf ball marker can be a fun and practical way to enhance your golf game. Whether you create a magnetic ball marker or a magnetic divot tool, you’ll appreciate the convenience that magnets can bring to your game.

Usage and Etiquette
Proper Placement on the Green
When it comes to marking your ball on the green, the proper placement of your ball marker is crucial. Always place your marker directly behind your ball, in line with your target and at a distance that allows your putter head to rest comfortably on the marker without touching the ball. This ensures that your ball is returned to its original spot after being lifted and the marker is not interfering with your putting stroke.
Respecting Golf Etiquette
Golf is a game of etiquette and respect for fellow players. Proper use of your ball marker is an important part of this. Always mark your ball before lifting it from the green, and replace it promptly after your turn is over. Be careful not to step on anyone’s line when walking on the green and do not move your marker unless asked by another player. Also, avoid placing your marker in the line of another player’s putt.
Remember that golf is a game of integrity and honesty, and proper use of your ball marker is an important part of maintaining that integrity. By following these simple guidelines, you can ensure that you are playing the game with respect for your fellow players and the course itself.
Maintenance and Storage
Golf ball markers are small and easy to lose, so it’s important to properly maintain and store them. Here are some tips to help you keep your DIY golf ball marker in good condition.
Cleaning Your Ball Marker
It’s essential to keep your ball marker clean, as dirt and debris can affect its performance. You can clean your ball marker by wiping it with a damp cloth or using a mild soap and water. Avoid using harsh chemicals or abrasive materials that can scratch or damage the surface of your marker.
Safe Storage Solutions
When not in use, store your ball marker in a safe place, such as a pocket in your golf bag. You can also use a small container or pouch to keep it protected from damage and prevent it from getting lost. Make sure to keep your ball marker separate from other golf accessories to avoid scratching or damaging them.
To prevent your ball marker from falling out of your pocket, consider using a magnetic clip or holder. These devices attach to your golf bag or clothing and keep your ball marker secure and easily accessible.
In summary, proper maintenance and storage of your DIY golf ball marker is essential to ensure it lasts for a long time and performs well on the green. Keep it clean and store it in a safe place, and consider using a magnetic clip or holder to keep it secure and easily accessible.
Sharing Your Creations
Congratulations on creating your very own custom golf ball markers! Now that you have your own personalized markers, you might want to show them off to your friends and fellow golfers. Here are some ways to share your creations with the world:
Gifting Custom Markers
One great way to share your custom markers is by giving them away as gifts. Your friends and family who love golf will appreciate the personal touch you’ve added to their game. You could also consider giving them away as prizes for a golf tournament or charity event.

To make your custom markers even more special, you could package them in a small gift box or pouch. You could also include a personalized note or tag to make the gift even more meaningful.
DIY Marker Communities
Another way to share your creations is by joining online communities focused on DIY golf ball markers. These communities are a great way to connect with other golfers who share your passion for personalizing their gear.
In these communities, you can share pictures of your markers, ask for feedback and advice, and get inspiration for your next project. You might even make some new friends who share your love of golf and DIY projects.
Some popular online communities to check out include the GolfWRX forum, MyGolfSpy forum, and Reddit’s r/golf community.
Remember, sharing your custom markers is a great way to show off your creativity and add a personal touch to your golf game. Whether you give them away as gifts or share them online, your markers are sure to impress your fellow golfers.