If you’re an avid golfer, you know how much time and money it takes to get to the golf course. Between greens fees, club memberships, and driving range passes, playing golf can be an expensive hobby. But what if you could bring the golf course to you? With a DIY golf simulator, you can practice your swing and improve your game right in your own home.
Building a DIY golf simulator may sound like a daunting task, but with the right equipment and a little bit of know-how, it’s easier than you might think. In this article, we’ll walk you through the process of building your own golf simulator from start to finish. We’ll cover everything from understanding the basics of a golf simulator to choosing the right equipment, building your enclosure, budgeting for your project, and enhancing your simulator experience.
Key Takeaways
- Building a DIY golf simulator can be an affordable and convenient way to practice your golf game at home.
- Understanding the basics of a golf simulator and choosing the right equipment are crucial steps in the process.
- By following our guide, you can build your own golf simulator enclosure and enhance your experience with additional features.
Understanding the Basics of a DIY Golf Simulator
https://www.youtube.com/watch?v=k8-OgBJV9z0&embed=true
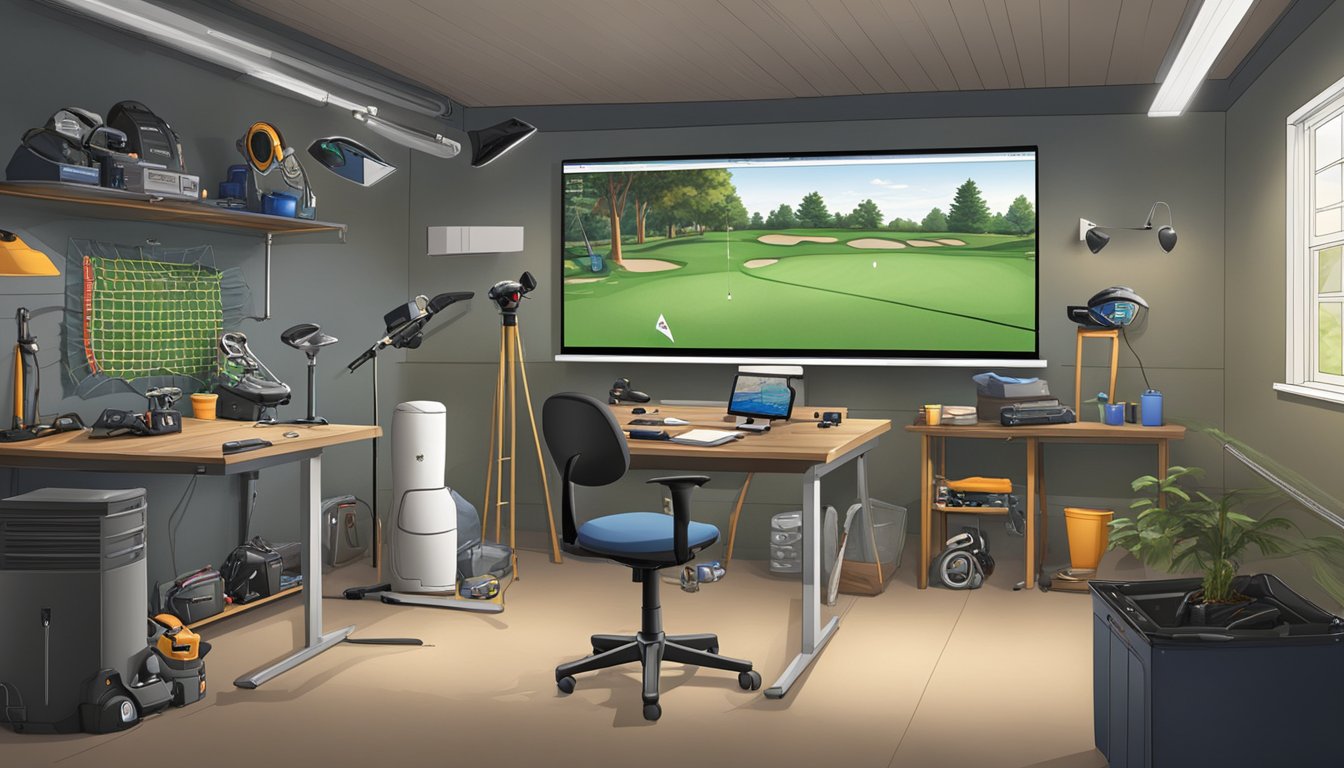
If you’re a golf enthusiast, you know how important practice is to improve your game. A DIY golf simulator allows you to practice your swing and improve your game in the comfort of your own home. Building a DIY golf simulator may seem like a daunting task, but with the right components and some basic knowledge, you can create a golf simulator that suits your needs.
Components of a Golf Simulator
A golf simulator consists of several components, including a launch monitor, tracking system, golf practice mat, golf simulator projector, impact screen and frame, and golf simulator software.
-
Launch Monitor: A launch monitor is a critical component of a golf simulator. It tracks the ball as it’s hit and provides data about your shot, such as ball speed, launch angle, spin rate, and more.
-
Tracking System: The tracking system measures ball and club data, such as ball speed, spin rate, distance, club head speed, and club path, and makes golf simulation possible in the first place. Without a tracking system, you won’t have a simulator.
-
Golf Practice Mat: A golf practice mat is essential for simulating a real golf course. It provides a surface to hit from and mimics the feel of a real fairway or rough.
-
Golf Simulator Projector: A golf simulator projector is used to project the image of the golf course onto the impact screen. It’s important to choose a projector with high lumens to ensure a clear and bright image.
-
Impact Screen and Frame: The impact screen and frame are used to display the image of the golf course. The screen should be made of a durable material that can withstand the impact of a golf ball.
-
Golf Simulator Software: Golf simulator software is used to create a virtual golf course and simulate real-life golf scenarios. There are many options available, and it’s important to choose software that suits your needs and budget.
Building a DIY Golf Simulator
Building a DIY golf simulator requires some basic knowledge of electronics and carpentry. You’ll need to create a space that’s large enough to accommodate the simulator components and has enough ceiling height to allow for a full golf swing.
When building a DIY golf simulator, it’s important to keep your budget in mind. You can save money by using affordable materials, such as PVC pipes, to create a frame for the impact screen.
In addition to the components listed above, you’ll need a computer or iPad to run the golf simulator software. It’s important to choose a computer or iPad with enough processing power to run the software smoothly.
Overall, building a DIY golf simulator can be a fun and rewarding project for any golf enthusiast. With the right components, knowledge, and budget, you can create a simulator that allows you to practice your swing and improve your game from the comfort of your own home.
Choosing the Right Equipment
https://www.youtube.com/watch?v=2A80NoFg-Fw&embed=true
When building your own DIY golf simulator, choosing the right equipment is crucial to ensure a realistic and accurate experience. Here are some factors to consider when selecting your equipment:
Selecting the Ideal Golf Simulator Software
One of the most important components of a golf simulator setup is the software. There are many golf simulator software options available, such as OptiShot and SkyTrak, that can be used on a PC, computer, laptop, or even an iPad. When selecting your software, consider factors such as accuracy, data points, and realism to ensure an immersive experience.

Picking the Perfect Projector and Screen
Another important component is the projector and screen. The projector should have a high resolution and brightness to ensure a clear and vivid image. The screen should be durable and large enough to provide an immersive experience. Consider factors such as screen size and impact screen material when selecting your screen.
Deciding on the Best Golf Mat and Hitting Zone
The golf mat and hitting zone are also important components of your DIY golf simulator. The hitting mat should be durable and provide a realistic feel, while the hitting zone should be large enough to accommodate different golf clubs. Consider factors such as turf and hitting pad material when selecting your mat and hitting zone.
Opting for the Accurate Launch Monitor
Finally, the launch monitor is a crucial component that measures data and provides accurate feedback. Consider factors such as accuracy and technology when selecting your launch monitor. Popular options include the SkyTrak, Trackman, Flightscope X3, GCQuad, Uneekor QED, and Uneekor Eye XO.
By considering these factors and selecting the right equipment, you can create a realistic and immersive indoor golf simulator experience.
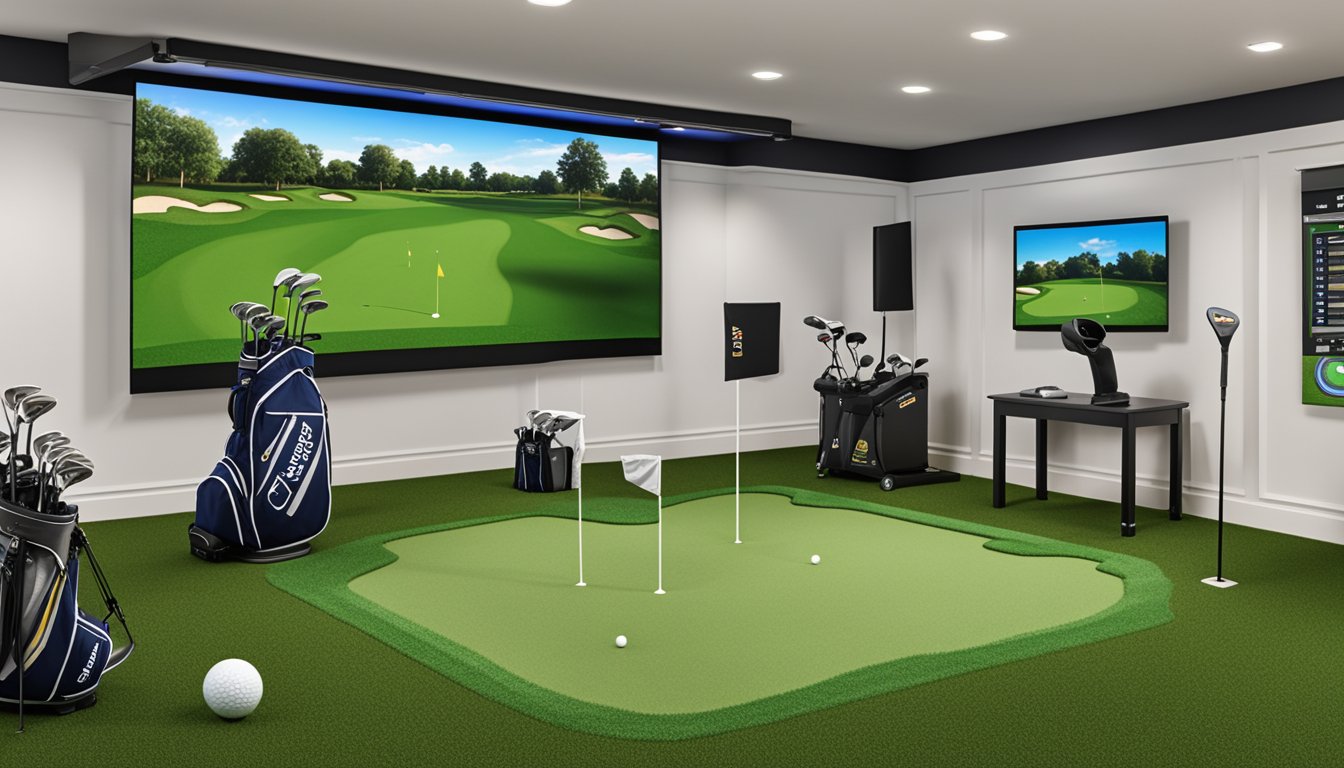
Building Your Golf Simulator Enclosure
https://www.youtube.com/watch?v=KzjCf0L5_js&embed=true


If you want to build your own golf simulator, one of the most important things you’ll need is an enclosure. The enclosure is what keeps the ball contained and helps to create a more realistic golfing experience. Here are some things to consider when building your enclosure.
Determining the Room Specifications
Before you start building your enclosure, you need to determine the specifications of the room you’ll be using. The room should be wide enough to accommodate your swing, deep enough to allow for proper ball flight, and tall enough to accommodate your swing and the height of the ball at its highest point.
When it comes to the dimensions of the room, you’ll need to consider the width, depth, and ceiling height. The minimum recommended room dimensions are 10 feet wide, 10 feet high, and 15 feet deep. However, if you want to create a more realistic experience, you may want to consider a larger room.
Setting Up the Enclosure
Once you’ve determined the specifications of your room, you can start setting up your enclosure. There are many different ways to build an enclosure, but one of the most popular methods is to use EMT pipes and bungees to create a frame for the enclosure.
To create the frame, you’ll need to measure and cut the EMT pipes to the appropriate length. You’ll then attach the pipes together using connectors to create the frame for the enclosure. Once the frame is complete, you can attach side curtains or a side net to keep the ball contained.

« Best Cobra Hybrids: A Guide to the Top Picks for Your Golf Bag
9 Simple Golf Tips to Lower Your Scores Dramatically »
You’ll also need to install a retractable screen at the front of the enclosure. The screen should be large enough to display the golf course and allow for proper ball flight. You can attach the screen to the frame using bungees or other fasteners.
Overall, building your own golf simulator enclosure can be a fun and rewarding project. With the right materials and a little bit of know-how, you can create a space that allows you to practice your golf game year-round.
Budgeting for Your DIY Golf Simulator
https://www.youtube.com/watch?v=ybmxsor5nQI&embed=true
Building a DIY golf simulator can be a fun and rewarding project, but it’s important to budget appropriately to avoid overspending. The cost of a personal golf simulator can vary greatly depending on the quality of the equipment and the features you want to include. Here are some tips for budgeting for your DIY golf simulator:
Determine Your Overall Budget
Before you start purchasing equipment, it’s important to determine your overall budget for the project. Consider how much you’re willing to spend and what features are most important to you. This will help you prioritize your spending and avoid overspending on unnecessary items.

Research the Costs of Key Components
The most critical component of a golf simulator is the tracking system, which measures the speed and accuracy of your shots. Two major technology standards of launch monitors are Doppler radar and photometric-based systems. Research the costs of these key components and determine which type of system is best for your budget and needs.
Consider DIY Options
Building a DIY golf simulator can save you money compared to purchasing a pre-built system. Consider building your own screen and enclosure using affordable materials like PVC pipes and netting. You may also be able to save money by purchasing used equipment or building your own hitting mat.
Be Prepared for Additional Costs
In addition to the cost of the tracking system, screen, and enclosure, there may be additional costs associated with building a DIY golf simulator. These may include computer hardware and software, projector, sound system, and lighting. Be sure to budget for these additional costs and prioritize based on your needs and budget.
By following these tips, you can create a budget for your DIY golf simulator that fits your needs and ensures you don’t overspend.
Enhancing Your Golf Simulator Experience

Now that you have built your own DIY golf simulator, it’s time to make the most of it and enhance your golf simulator experience. Here are a few ideas to help you get started:
Features and Graphics
One of the most important aspects of a golf simulator is its features and graphics. Look for software that offers a variety of features such as virtual golf course play, mini-games, and challenges. High-quality graphics are also important to create an immersive experience. Consider investing in a high-resolution projector or monitor to enjoy crystal-clear images.
Immersive Experience
To create an immersive experience, consider adding impact netting around your simulator to prevent any damage to your surroundings. You can also add a few decorations such as golf-themed posters or a putting green mat to create a realistic golf environment.
Audio System
An audio system is an essential component of any golf simulator. Consider investing in a high-quality sound system to enjoy realistic audio effects such as the sound of the ball hitting the club or the wind blowing. You can also connect your audio system to your Bluetooth-enabled devices to enjoy your favorite music while playing.
Connectors
Connectors are important to ensure that your golf simulator is working properly. Make sure that all connectors are properly connected and that there are no loose connections. Consider using high-quality connectors to ensure that your golf simulator is working at its best.
In conclusion, enhancing your golf simulator experience is all about investing in high-quality features, graphics, and audio systems. Creating an immersive environment with impact netting and decorations is also important to create a realistic golf experience. Make sure that all connectors are properly connected to ensure that your golf simulator is working at its best.
Frequently Asked Questions
https://www.youtube.com/watch?v=rD9aZ3BE2K4&embed=true
What are some affordable options for building a DIY golf simulator at home?
Building a DIY golf simulator can be a cost-effective way to play golf at home. Some affordable options for building a DIY golf simulator include using a launch monitor, a projector, and an impact screen. You can also use a golf practice mat, net enclosure, and computer software. However, keep in mind that the cost of building a DIY golf simulator can vary depending on the equipment you choose to use.
How accurate are DIY golf simulators compared to professional simulators?
DIY golf simulators can be accurate, but they may not be as accurate as professional simulators. The accuracy of a DIY golf simulator depends on the equipment you use and the quality of the software. A high-quality launch monitor and projector can help improve the accuracy of your DIY golf simulator.
What are the minimum space requirements for a DIY golf simulator?
The minimum space requirements for a DIY golf simulator depend on the equipment you use. A golf practice mat requires at least 9 feet of ceiling height and 10 feet of width. If you plan to use a launch monitor, you will need additional space for the device and the ball flight. A projector and impact screen also require additional space. Generally, you will need at least 10 feet of width, 12 feet of length, and 9 feet of height for a DIY golf simulator.

Are there any DIY golf simulator kits available for purchase?
Yes, there are DIY golf simulator kits available for purchase. These kits usually include a launch monitor, projector, impact screen, and software. They are designed to be easy to set up and use. However, keep in mind that these kits can be expensive.
Can a DIY golf simulator be used with a regular TV or monitor?
A DIY golf simulator can be used with a regular TV or monitor, but it may not provide the best experience. A projector and impact screen are ideal for a DIY golf simulator because they provide a larger image and better visibility. However, if you are on a tight budget, a regular TV or monitor can be used.
Are there any free software options for building a DIY golf simulator?
Yes, there are free software options available for building a DIY golf simulator. Some popular free software options include The Golf Club, WGT Golf, and Perfect Golf. However, keep in mind that these software options may not be as advanced as paid options.
